Wednesday, December 27, 2017

Roasted Honey Mead - AWESOME!

Christmas Day 2016, we tasted my first mead... and it was bad. So while I am an amateur (for now) I am determined to get it right.

"The secrete to doing anything is believing that you can do it," - Bob Ross.

If you have followed any of my Mead blogs, then you know that this year I made all of my mead with roasted honey (or the honey that is rendered after I heat my wax to 160͒F). It worked GREAT!

In two previous blog entries: Mead: Mastering the Basics & Beetles, Chickens, and Mead, I explained my process and mead recipes. However, I failed to report what happened when I bottled it.

On the first racking, it tasted a little dry, so I back sweetened one bottle and left the other as is. Once again, in the words of Bob Ross, "We don't make mistakes. We just make happy accidents." So by back sweetening I inadvertently made Campaign - thankfully the bottle didn't blow up.

So at the five month aging marker, on Christmas Day 2017, we tasted it. The Campaign (or sparkling mead) was very sweet with 12% alcohol and had wonderfully delightful bubbles that seemed to go on forever. We didn't let it breathe at all, yet it was delicious with no odd tastes from the roasted mead.

The second bottle, I let breathe for exactly 20 minutes. It too was delicious. Still a little sweeter than I would have normally drank but I think a lot of people would have enjoyed this as a desert wine. It had 8% alcohol.

I am so excited and I am invigorated by the prospect of mastering the craft as I progress.

On a separate note: after two years of blogging, I finally got my first comment:

toptan bal fiyatları 
koyu renk petek bal 
süzme çiçek balının faydaları
çam balı teneke fiyatları
petek balın rengi nasıl olmalı

I like to think it says:
I love America
I love your blog
You are hilarious
I look forward 
to your next adventure

Happy New Year to All!

Monday, December 11, 2017

Linda Passed Away

"A year from now you may wish you had started today," Karen Lamb

I have been overwhelmed as of late. I can't put my finger on the exact cause of this feeling but it is there just the same and it has been crushing my productivity.

Nonetheless, Monday (12/4/17) I finally managed to winterize my hives. It went very well despite working in a light misty rain. However, it was warm and the bees were agreeable.

I did not merge hives B.1.1 and VSH as planned. I made all the preparations - I reduced B.1.1 to one single super and placed paper over it. However, when I opened the VSH hive it was full of both bees and beetles.

B.1.1 is small and should make it through the winter but I doubted it could survive another beetle attack. So I closed up both hives and left them separated.

Only time will tell if this was the right decision.

On a personal note: My mother-in-law past away on Tuesday (12/5/17). She has been sick for years with a mental condition that mimics dementia and over the past couple of years she had required full-time care. The task was divided amongst my mother, nephew, daughter, son, paid sitters, me, and my wife (the order of those names gives the magnitude of contribution with about 90% of it falling on me and my wife).

It has been exhausting. Her passing feels like a blessing but saying that feels selfish and cold. My wife has now lost both of her parents in the past 18 months and that breaks my heart for her. Just the same, I am sure that the reduced stress of caring for her mom will actually make her life infinitely better - once she has finished grieving of course.

I don't know if my feelings of being overwhelmed are significantly linked to my mother-in-law or if I am just lazy. The weeks to come will answer that question. Either way, 2017 is coming to an end and Spring will be here before you know it.

I have two goals for next year: 100 hives and mastering queen rearing. I think I'll make a chart to hang in the shop and mark off each hive as I build it - then do the same in the spring and mark them off as I fill them with bees.

BTW: My chickens started laying eggs the day before Thanksgiving and I am getting an egg every day now.

Friday, November 17, 2017

Drones at the edge of winter

Link to YouTube Here
"Never trust a woman, even though she has given you ten sons," Chinese Proverb

That's a fitting quote given that my hive is full of sons (drones). This is a heartbreaking event so late in the year.

While doing a little winter preparation, I opened up the first hive (Hive-VSH) and found that it was full of drones. I felt sick. It was also full of beetles. Though neither issue seemed to be effecting the health of the hive - for now.

I quickly checked the other hives in the yard and they all seemed fine.

Hive-B.1.1, despite having issues earlier, has managed to make a come back but is still a little on the weak side with only about 8 frames of honey.

Without removing any frames I looked for signs of brood but didn't see any. I suppose the queens have quit l
aying for the winter. It was a bad idea anyway but I thought I might stick an egg in Hive-VSH in hopes that they might make a queen before the frost set in.

However, after watching the YouTube video (the picture above is linked) I've decided to merge VSH and B.1.1 together. I was already leaning in that direction but the video pushed me over the edge. So if this causes both hives to die, then I'll blame that YouTuber.

The weather will be warm and dry again of the Friday after Thanksgiving and so I plan to make that my final visit for the year.

I have taken the next 9 days off from work for Thanksgiving. I plan to use the time to get my wood shop cleaned up (it got pretty disorganized throughout the bee season) and to start building hives for next year.

I also plan to build a new beetle trap and try it out over the winter. I've made a little sketch here.

Next Blog will be on how I merged the two hives. Until then, Happy Thanksgiving.


Monday, November 6, 2017

Pear Mead: One Month Out

"In wine there is truth," Pliny the Elder... and with a name like that, you have to believe him.

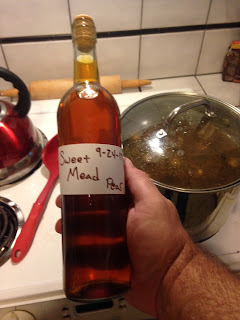
I spent the weekend doing chores around the house. Of my many tasks, Sunday I bottled the Pear Mead I made on 9/24/2017.

Mistake 1: While I was preparing to bottle, I kept thinking there are 3.7 litters in a gallon - which is true. So I set out three bottles and a couple of 8oz. mason jars for the .7 litters - most of you may already see the error here.

So I sanitized all my equipment, set my corks to soaking, and then began siphoning (quite successfully I might add) the mead into the bottles. When the three bottles were filled, I still had a 1/2 of gallon of mead left. Dote!

I of coursed panicked and, in doing so, stirred the sediment at that bottom - not totally but enough to cloud the remaining mead.

In the end I ended up with three crystal clear bottles of mead and two slightly cloudy 8.oz mason jars. I placed the mason jars in the fridge to chill for tasting later that night. The rest went down the drain.

This is as far as I can push
it with my hand.
Mistake 2: I needed to cork the three bottles. I have an Italian Double Lever Corker (that did not come with instructions.) The last time I used it, I only corked two bottles and the corker was next to useless.

Now I might have mentioned this before but I am a rather large fellow. So to cork the bottles, I placed the base of the bottle on an oven mitt for traction, then I used my bare (bear) hand to force the cork into the neck of the bottle. Then I placed the Corker on the remaining 1/4" (and after about 20 attempts) I made the cork flush with the top of the bottle.

WHAT A USELESS CONTRAPTION! Or so I thought.

This time, I had the same trouble but after I had already forced the corks into the neck of the bottle by hand, I couldn't get the corker to drive them home.

So I did what I should have done in the first place - I YouTube'd it.

Wow, talk about feeling like the guy who tried to make orange juice by concentrating. It was too late for the three bottles I was working on but now I can't wait to try the corker out. (It took a lot of restraint, not to cork an empty bottle.)

Tasting Note - One Month Out:

The Pear Mead tasted very dry at first with a faint sent of pear and a strong sent of yeast. However, after allowing it to air for 40 minutes, it tasted a little less dry but had an acidic finish. I am hoping that time will reduce the acidity.

This was a sweat recipe with an added cup of pears (see previous blog: Mead - Mastering the basics)

Wednesday, November 1, 2017

Predator-Proofing my Chicken Tractor

"Regard it as just as desirable to build a chicken house as to build a cathedral," Frank Lloyd Wright

My first three months of chicken husbandry was a lot more work than it needed to be. Taking the chickens outside every day and carrying them back inside every night was a hassle and quite time consuming. Thankfully that is behind me.

It took nearly three months to get around to it but I finally finished my chicken tractor. The original chicken tractor was done months ago but I wanted mine to be more predator-proof. So last Wednesday, despite being run down from two weeks of long office hours, I got a second wind and four hours later, it was done.

The extra step was to attach out-rigging to the base of the pen to prevent predators from digging under the edges. I think this is a pretty good idea.

I expected that lifting the out-rigging during moves would be an issue and had planned for an elaborate pulley system. Luckily the out-rigging doesn't cause any issues at all. I attached the pull rope to the front rigging so it lifts automatically. The two sides stay in the out position as the back edge never looses contact with the ground. And the tail end (that is identical to the front) just slides along as I pull. It works GREAT!

Chain link hinges
One problem I did have was that hinges are expensive. Not so much individually but I needed eight of them and that began to add up quickly. So (and I think this is one of my best ideas ever) I used links of chain instead. I simply took an old chain and cut sections of three links per hinge. Then I screwed them in place with washers (which I just happen to have exactly the right amount of in my scrap bucket - not that they cost much).

The out-rigging was made out of four pressure treated 2x4x10' that I ripped down the center. My coup is 4x8, so the extra two foot of left over was used as the end pieces of the sides. The front and end is 6' tapering to 4' (truthfully, this happened because I meant to use 2x4x12' but it turned out to look great). The final diagonal bits were constructed out of scrap I had from the original coup build.

Upside-down
showing the wheels engaged
Time will tell if my chicken tractor is truly predator-proof. However, I think this is great solution that only added $30 more to my overall cost. The best part is that now it only takes me about two minutes to feed, water, and move my chickens each afternoon.

I also attached some wheels that I haven't used since the night I first put them on. The tractor is light enough that I really don't need them.

So that's my predator-proof chicken tractor. Leave a comment and let me know what you think.

Monday, October 9, 2017

Failure: My First Hive Removal

He looked so happy...
He had no idea of
the carnage to come.
My fortune cookie Saturday night read, "Failure is the chance to do better next time." 


Saturday, Noah and I performed our first hive removal. While this could prove to be a good little side business, we didn't charge. One reason that we didn't charge, was because we had no idea what we were doing. The other reason was because I could really use the bees.


Intake and outgoing hose holes

I got up early Saturday morning and, with the help of YouTube, I built a bee vacuum out of a five gallon bucket. It was very simple and only cost about $25 total including the shop vac.

Step one: Get a five gallon bucket, an easy to remove lid, and a cheap shop vac.

Step two: Cut three holes in the lid; one for the intake hose, one for the outgoing hose, and a large one for a vent (to control the amount of suction).
Inside view of of intake and outgoing

Step three: Place #8 hardware cloth over the outgoing nozzle so the bees stop in the bucket and over the vent hole.

Step four: Secure all hoses and hardware cloth with zip-ties.

It's just that easy.

I also placed a loop of foam so that the incoming bees would have a soft landing as they came into the bucket.

#8 Hardware cloth over
outgoing hose end
Then, Noah and I headed to the scene of, what would later become known as, the scene of the massacre.

We suited up completely, since we had no idea how aggressive the bees would be. This turned out to be unnecessary as this was the gentlest hive I've ever seen. Absolutely nothing we did upset these bees. We tore down the outer wall and the bees didn't care. We cut out the comb and the bees didn't care. We vacuumed them up and the bees didn't care. It was amazing.

The hive seemed big at first but, after cutting it out, it only filled one and a half deep supers. However, we suctioned three gallons of bees!

I was so excited. The removal was text book and we now had a hive of Super Gentle Bees.

However the removal was exhausting. It took about four hours and even though it wasn't very hot, it was very humid. Since we took our time vacuuming the bees, I stayed in a squatted position for a large part of the time. Did I mention I'm fat and out of shape.

The last thing we did was to swing by Dr. D's and picked up a frame of eggs, just in case we had accidentally killed the queen. Then Noah headed home and I took the hive to my house.

I was tired and it was beginning to rain slightly, so I covered the vent hole in the bucket with a bandanna, and went in the house for a break. An hour later, I placed the hive on its new stand, and dumped the bucket of bees into it.

Dead. They were all dead.

Three gallons of bees, were all dead. It seems that even though we thought we were using low suction, we had actually pureed the bees.

I was so tired (and defeated) that I just closed the lid and went inside for the night.

The next morning I got up, and retrieved the honey - no point in losing everything... or so I thought. It seems that leaving three gallons of dead bees on the honey overnight somehow tainted the honey and as I was extracting it, I began smelling a foul sour smell. The 2-3 gallons of honey was ruined.

In the end, all I got for of my trouble was a couple of pounds of wax and some much needed experience.

Lessons learned:

For the most part, the removal had gone very well. The biggest surprise was how long it took. Some beekeepers charge as much as $300... I now see why.

As for my bee vacuum: I plan to add a clear smooth bore hose on the incoming side. This will not only allow me to see how fast the bees are being sucked in but it will also keep the bees from being sucked down a four foot long washboard.

Lastly, and I keep learning this one the hard way, being tired (or defeated) doesn't mean you are done working. Had I immediately cleared the dead bees from the honey and took it inside for extraction, I would have had at least $200 worth of honey. It would have only taken another hour but I gave up.

From now on I will end my workday by asking myself, "Are you quitting because you are finished or is your business finished because you quit?"

Friday, October 6, 2017

Mead Note: One month tastes

This is our new stray cat, Buffy
She looks like I feel.
"If you can't explain it simplyyou don't understand it well enough," Albert Einstein

I posed a simple question on Facebook's Mead Makers page. What should I expect a semi-sweet mead to taste like at the one month racking?

Almost all the answers were the same: "You will get a feel for it over time."

While this may be true, it is condescending and the most useless answer I can imagine. 

In fact it takes me back to when I learned to drive a stick-shift. If anyone ever taught you this, they said the same thing: "You have to push the gas at the exact same time you let off on the clutch... you will get a feel for it over time."

Well, that's bull shit! The truth is that you actually give it a little gas before you let off the clutch or it will stale. Sure, over time you "get a feel for it" but that is what is actually taking place.

So if you don't know the answer to a question, don't answer it.

All that being said, I want to make a few notes about my first three meads. I have quit using a paper journal to keep these sorts of notes so I now put them here... read at your own risk:

Mead #1 

We tasted my first mead after a year of aging last Christmas. It was strong but fairly tasteless. To describe it a little better it was very dry and only had the faintest hint of honey. 

Two days ago (after two years) I decided to bottle it and found that the airlock had gone dry. I tasted it. To my surprise it didn't taste like vinegar. More surprisingly, it didn't taste like much of anything. The dry tasteless mead now tasted like it had been watered down. It still tasted fairly dry (though not as strong) and tasted as if it had been diluted with at least 3/4 water. 


I poured it down the sink.

Mead #2

I just made #2 (#2 hehehehe)  mead about two months ago. I racked it at week 4 and tasted it as I did. The alcohol taste was overpowering and I couldn't taste much else.

Since I had only made 1.5 litters on this one, I decided to put it in two screw top bottles (I later read that screw-tops don't seal too well). Just the same, I left one bottle as is and added a 1/4 cup of honey to the other bottle.

After two weeks, I again racked the two bottles into fresh ones (they both had a lot of sediment) and I added distilled water to fill them up. I tasted both.

The "as is" bottle tasted sweet and the alcohol taste had gone away. Looks like this one might be good by Christmas.

The one I had back sweetened was too sweet - like drinking pure honey. I don't think this one will be drinkable.

I corked both.

Mead #3

This mead stopped bubbling after a very vigorous week (I didn't hydrate my yeast and that may have made it stale). So at a week and a half, I racked it. I did not taste it but I will wrack it again in a couple of weeks and make notes of the taste then.

By all means, if any mead makes read this and have any "actual" answers, please leave a comment.

Monday, October 2, 2017

What if my alpacas get flees and other insane thoughts

“It is always darkest just before the day dawneth.” Thomas Fuller, circa 1650

I woke up at 3:30am and my first thought was, “What if my alpacas get flees?” It would be a reasonable question… If I had alpacas!

It all started partly because my wife is afraid that opossums will eat our beloved chickens. In turn, for the past 2 or 3 months, every morning I am forced to hump the chickens out to their pen and every night I have to drag them back in to the brooder. Mind you, the chickens are fully grown.

So I researched chickens and that led me to Justin Rhodes’s farm video tour, who did a video about a family that raised sheep, to get the wool, to spin the yarn, to knit the hats… In The House That Jack Built.

That sounded really interesting, so on a whim I looked up wool and that led me to alpacas who turn out to be great guard animals for… wait for it… chickens!

We won’t be getting alpacas. I live in town and the bees and the chickens are already pushing the limits of the city ordinances. I give the neighbors honey (and eggs when they start laying) but not a lot of people would be swayed with the gift of an alpaca fleece. However, one day when we buy a place in the country… well… who knows.

Here in the real world:

Noah and I visited both of the apiaries Saturday and all the bees are doing well. I also added an empty super of freshly waxed frames to Hive-B.1.1 - that gives all the hives two deep supers at Dr. D's.

I harvested a deep super of honey from the old farm. The odd thing was that there were supersedure queen cells in that hive – though they seemed a little old and there was still plenty of brood. I think it's okay.

I’ll still need to winterize the hives this month but for now, it is still in the 80’s and the goldenrod is in bloom.

Final Count – 8 hives.

Sunday, September 24, 2017

Mead - Mastering the basics

"Wine is constant proof that God loves us and loves to see us happy," Benjamin Franklin

Bees make honey but men make mead - the latter being the more remarkable. Mead is extraordinarily simple to make and fairly idiot proof as I myself have proven.

I have taken to making my mead from the cooked honey that I get when I melt my wax. This past weekend I racked my second attempt and then made a third batch. I tasted the mead as I siphoned it and it tasted pretty good - at least it didn't taste off. It was a bit dry but I had used a dry recipe.  The simple recipe I am using is from stormthecastle.com and is as follows:

Dry Mead
  • 12 lbs. of Honey 
  • 4 gallons of spring water
  • 5 teaspoons of yeast nutrient
  • 5 teaspoons of yeast energizer
  • 2 packets of Lalvin 71b-1122 yeast (or a suitable replacement)
Medium Mead
  • 15 lbs of Honey
  • 4 gallons of spring water
  • 5 teaspoons of yeast nutrient
  • 5 teaspoons of yeast energizer
  • 2 packets of Lalvin 71b-1122 yeast (or suitable replacement)
Sweet Mead
  • 18 lbs of Honey
  • 4 gallons of spring water
  • 2 teaspoons of yeast nutrient
  • 2 teaspoons of yeast energizer
  • 2 packets of Lalvin 71b-1122 yeast (or suitable replacement)

However, I don't make five gallon batches as that is just too much honey to waste on an experiment. Instead, I make one gallon batches and alter the recipe by parts. Like this:

Sweet Mead
  • 1.5 part Honey (1 quart)
  • 4 parts spring water (2.75 quarts)
  • 1 teaspoons of yeast nutrient
  • 1 teaspoons of yeast energizer
  • 1 packets of Lalvin 71b-1122 yeast

I keep my mead in a warm area for the fermentation and cover it with a towel to keep it in the dark. After wracking it, I move it to an area near the A/C and store it at about 68͒. I know I should keep it at around 58͒ but I don't have that kind of setup yet.

Now my first batch is nearly two years old. We tasted it last Christmas and it was very strong and dry. The second batch is a little sweeter but still dry. When I racked it, I added a half of cup of honey to one of the bottles to back sweeten it. That may have been too much. To make sure it didn't begin fermentation again, I placed a rubber glove on the bottle over night. After 24 hours (and no sign of gas build up) I put a cap on it.

I created a third batch this past weekend and used the "Sweet" recipe but I also added a cup of pears.

When my wife and I were in Ireland we tried Bunratty Mead at the Bunratty Castle. That mead was infused with pears and was amazing. It wasn't too sweet and the pear flavor added a soft layer of fruitiness. I can only hope my mead comes out even half as good. Only time will tell.

Monday, September 11, 2017

The Magnificent Seven

Hive-B.1.1.VSH
"Adopt the pace of nature: her secrete is patients." - Ralph Waldo Emerson

I'm down to (8) hives; one at the old farm and seven at Dr. D's. However, three of those hives are from recent splits. Given my recent loses, I've been obsessing over these remaining hives. The thought wakes me up at night and I imagine empty hives that look like the ruins of bygone civilizations.

The trouble is that with this project still only a side venture, it's priority often slips down the list. So when I finally got out to Dr. D's this weekend, I was nearly sick with worry. However, it turned out to be the best beekeeping day of the year.

For starters it was a pleasant 85͒ and sunny. Given how hot it's been this year, this felt like air-conditioning.

However, what made the trip so wonderful was how well all the bees were doing.

Hive-A has filled six of the ten re-waxed frames with honey.

Hive-B was full but didn't show any signs of swarm cells, so I added a box of re-waxed frames.

Hive-C.1 had three boxes so I harvested a box of honey, leaving two supers.

Hive-C (like Hive-B) was full but didn't have any swarm cells, so I added a box of re-waxed frames.

Hive-B.1 & Hive-VSH both had lots of activity so I didn't open them.

Hive-B.1.1.VSH, despite previously being overrun by beetles, has snapped back. It has a beautiful queen that is laying like crazy and the bees have filled six frames with brood, pollen, and honey.

All seven hives are doing really well. In fact, next year, I plan to make splits in mid-August since the bees seem to have so much to forage.

Re-Waxing Frames:

I mentioned that I put re-waxed frames in the hives. I've mentioned this before but bees WILL NOT build on bare plastic frames. They have to have a thin coat of wax on them. "How thin?" is the question.

I melted what little wax I had in a metal pan and added two parts water. Then I did my best to stir the mixture as I worked to make the wax as thin as possible. However, I am not sure the water actually mixed with the wax.

The first (13) frames worked out perfectly. Each took just enough wax to highlight the printed comb pattern. However, the last seven frames had mostly water but it gave the frame a slightly tacky feel - Hopefully this was enough wax to get the bees started.

To see if it works, I marked each frame with either "Good Wax" or "Wet Wax". I placed the good frames in the middle of the hive so that the bees could fill these first but hopefully they will fill them all.

End of the year:

I only plan to open the hives two more times this year. This weekend I will go back to Dr. D's and gather all of my hive top feeders. After I caulk the inside of them, I will fill the void with diatomaceous earth and cedar chips.

I will then return to Dr. D's to set the hives up for winter. I will place a feeder on each hive as well as an unscented swiffer pad on each the bottom board. Finally, I will dock the front entrance up so that there is only about an inch of open space. With that, I will say a prayer, and wait for Spring. I'll still visit the hives once a month to heft them and feed them if need be but other wise, the season is over.


Thursday, September 7, 2017

Swarm Prevention - I should have added a super

"Fear causes hesitation, and hesitation will cause your worse fears to come true." - Bohdi, Point Break (1991)

My five frame nuc (VE) needed room to grow but I hesitated because I was afraid if I put another super on too soon, that it would cause the beetles to take over the hive.

However, by not putting on a super in time, the hive swarmed. The remaining hive was too weak and the beetles overtook it anyway.

Damned if I did and damned when I didn't - and now I have lost all of my five frame nucs. However, that is not the whole story. Instead of adding empty frames I had planned to add the honey supers I had stored in the freezer (from a previous beetle infestation). I suspect that this would have invited beetles.

The answer is to add empty frames. The empty frames provide room for the bees to grow without giving the beetles stores to infest. I could have added a frame or two of honey but not a full super of honey.

Subsequently:

The splits I made at Dr. D's need another super on them as well. I had planned to add them this past weekend but I was sick with a stomach virus and haven't had the chance. So I will do it this Sunday instead. God willing it won't be too late.

Thursday, August 24, 2017

Facing Reality - The Hive Count

"Most people give up just when they are about to achieve success." - Ross Perot

My heart kept whispering that quote in my ear yesterday to keep my brain from acknowledging my eyes. So what had my eyes seen?

Hive-A.1.VSH was empty. The strong, healthy hive that I had harvested from this year and was set to be the mother of all my future grafts was empty. The five frame nucs that flanked each side of the hive were healthy. No signs of beetles. A little moth silk but even that looked like it had come after the exodus. The bees had simply absconded.

I felt gut-punched. After a year of hard work and struggles, all my efforts have had little to no payoff. While there may still be time to graft a few queens for practice, the time to split hives is over.

It is so frustrating knowing how close I am to breaking through and yet to have made so little progress this year.

I went inside and told my wife. Jen didn't say much at first. She knows I'm trying (I wish I could say I'd done my best but, in my heat, I know I could have done more.)

I poured a Coke Zero over ice and flipped on YouTube - despair has set in.

It's funny how sometimes you get just what you need just when you need it. Justine Rhodes, who is doing a farm tour series picked yesterday to remind people that it doesn't matter if things workout or not, "Just Plant."

When the video was over, Jen looked at me and said, "So there you go."

She was right. So I got my gear together and made a full inventory of all three yards.


My backyard was first. VD is still limping along, VE is thriving, and VF is still waiting to receive grafts. Of course Hive-A.1.VSH is empty.

The Old Farm was next. This was actually the first time I had been to the old farm all year - mainly because it is always too muddy out there and because it is (15) miles away. I found just what I expected. The cantankerous hive that had fallen over in 2016 was dead but the other hive had actually thrived and had (4) full boxes of honey and bees.

Then I went to Dr. D's place. All (7) hives are doing great - even Hive-B.1.1 that had previously been infested with beetles. Hive-B.1.1 doesn't have a queen or queen cells but had lots of healthy looking bees - so I placed another frame of eggs from Hive-B.1 in there.

I tried to steal a queen cell from Hive-C but they had already hatched out the queen - a fact I would have known had I done the math. Hive-C's queen was actually due to be out mating yesterday - I hope my inspection didn't cause any problems.

The other good news is that the frames that I re-waxed and placed in Hive-A are being drawn out perfectly. So all of those old plastic frames I have can still be salvaged.

All in all the final hive count is Old Farm (1), Dr. D's (7) and Home (3) five frame nucs.

Am I disappointed that I don't have (100) hives now? Sure - though it wasn't really a realistic goal. However, I don't think I started with (6) since the one at the old farm probably never made it through the winter. So, I turned (5) hives into (8) hives with (3) nucs.

Given all the mistakes I made this year (that I won't make next year) - my gains were still gains. Next year will be better and my gains will be exponential. So bring on the winter, so I can get out in my shop and build some boxes!

So there you go.

Monday, August 21, 2017

Chickens: 107F Heat Index

This weekend was hotter than midget porn - 95͒ F and 60% Humidity.

Summer in the Mississippi Delta is like nowhere else on earth.  It's hard to say what is more demeaning; the way my sweat soaked shirt clings to my chest or how my testicles cling to my knee. Yeah, it's that hot.

Despite the heat, I did manage to build my chicken tractor. It's double wrapped with chicken wire to prevent predators from chewing through. I still need to build a roost inside and add some out rigging to prevent opossums from digging under but the hard part is done.

My wife has fallen in love with our chickens and doesn't want to put them outside but it's getting to hard to keep their cage clean enough to keep them in the backroom. So for now, they will be outside in the pen during the day and in the backroom at night. However, in a week or three, the chickens will have to go outside full-time.

Thursday, August 17, 2017

Procrastination and bad weather

"Procrastination is like masturbation. It feels good at first but in the end you are only screwing yourself." - Author Unknown

While I have a few readers out there, the truth is that this blog is as much a journal to myself as it is meant for others to read. So today's entry is just a reminder to myself.

The summer is quickly coming to an end and I am getting so little done. It's a lot like that feeling you get when you can't sleep - that minute to minute rationalization/compromise where you tell yourself, "if I go to sleep right now, I can still get six hours sleep." An hour later you tell yourself, "if I can just go to sleep now, I can still get five hours sleep." And so on and so on until the unforgiving daylight breaks into the room like a nuclear alarm clock.

The past two weeks have been one rainy day after the next. When the sun does shine, I have a million things I need to get done of which I only seem to ever get a half of a million of them completed.

Yesterday was no different. I got off work at noon, came home, changed the steering pump in my son's car, and then I ran out of steam. I had planned to make some grafts but I was give out.

Noah was over at the house, so we did manage to walk out to the apiary in the backyard. We didn't get dressed or take a smoker so we didn't open the hives - well sort of. We noted that Hive-A.1.VSH had about (20) bees on the landing and Hive-VE had a lot of traffic too.

Hive-VD (giggle giggle) only had two or three bees on the landing so I dared to open the lid. It was just a quick look but this is what I saw:
  1. There are not a lot of bees inside.
  2. The bees have begun to build comb from the lid - because of the beetles this hive only has two frames in it.
  3. There was brood. It was a quick look but it did not look like drone brood. Could it be that the hive has a queen? Could one of the virgins from Hive-VE have flown into the wrong hive and set up shop? I'll give it a closer look this weekend.
Well it's late but I might still have SIX weeks of summer left... the nuclear alarm clock is ticking. 

Thursday, August 10, 2017

Part 1 of 3 - Beetles, Chickens, and Mead

"Anyone who has never made a mistake has never tried anything new." - Albert Einstein

It is never my intention to spin my mistakes into a positive light for the sake of my ego. Nonetheless, Saturday's splits have taught me a valuable lesson.

When performing a walkaway split, with a strong hive, in the same bee yard, it is best to always do as follows:

Move the entire hive to the new location - the distance between the old location and new location doesn't matter. Then place one box on the old location. Ensure that both hives now have a frame of eggs (with nurse bees), a frame of pollen, and ample honey. Now all of the young bees will stay at the new location, while all of the field bees will return to the old location.

I did this with Hive-C and it made a perfect split. The hive on the old location now has about (8) or (10) new queen cells and both hives are full of bees.

HOWEVER, on Hive-B.1 I did just the opposite and only moved the one box to the new location. As a consequence, the new hive was destroyed by beetles. All of the brood was killed and two frames were completely infested with beetle larva.

In an attempt to fix the problem, I removed the infect frames. I also removed any empty frames and replaced them with undrawn plastic frames to reduce the area the bees would need to protect. The hive had about two heaping frames of bees still so it is not a total loss. I then took a frame of eggs from Hive-VSH and placed it in the effected hive.

If it lives, then great. If not, lesson learned.

Now on to Part-2...

Part 2 of 3 - Beetles, Chickens, and Mead

"What is best in life?" 
"Crush your enemies. See them driven before you. Hear the lamentations of their women." - Conan the Barbarian, 1982


Clockwise: Amelia Egghart, Bernice, Melba, Marsala,
and Spot is off camera. 
Part-2: The Chickens and the Beetles:

I like my chickens and my wife loves them but I have questioned my decision to get them since the day I bought them. Not because they are not a joy to own - they really are. But because I bought them to eat beetles yet they will not be big enough to go outside until bee season is over.

However, when the beetles infested my new split, Noah had a capital idea. "Why don't we feed them to the chickens." And so we did!

It was like throwing my enemies to the lions. The larva infestation was epic but my minions feasted on those unholy spawns like a pack of Velociraptors on tar-pit trapped Brontosaurus. Jen, Noah, and I all stood cage-side, watching the carnage with gleaming eyes of satisfaction. Though it was inaudible, I like to believe that the beetle larva were wailing as they were being devoured and I hoped that somewhere in my bee yard, a tiny tear was rolling down the face of a mother beetle.

Part 3 of 3 - Beetles, Chickens, and Mead

"I have never seen mead enjoyed more in any hall on earth." Beowulf

If you keep bees and have never tried mead then you have missed the point of beekeeping. Mead has as many variations as wine or beer but has it's own unique identity.

Since I live in Mississippi, the only mead that seems to be imported into the state is from the oldest meadery in the country, Chaucer's Mead. Not a highly rated mead but it comes with a spice bag that can be added to a heated batch. This warm spiced mead has now become a family tradition for the past five or six Christmas's in our house.

Since I have always had a fantasy of owning a winery, owning a meadery seems almost as romantic. Therefore I have been experimenting with home mead making for the past year or so. My first batch was okay but a little dry.

However, while harvesting honey this year I had an idea. Each year I have a lot of wasted honey that never quite comes out of my cappings. It gets heated when I melt the wax and tastes a little off - sweet but off. I've heard of people using it to make barbecue sauce but I thought, "Why not Mead?"

So this year I harvested (8) frames of honey. I don't have much honey this year, as I have been focused on making splits. Just the same, I took the cappings after they had drained and I put them in a tin pan with (1) cup of water. Then I melted the wax at 200͒ F. I then let it cool and lifted the wax off the top. What was left was a dark mix of water and honey.

I poured that into a measuring cup and had (1.75) cups of honey mixed with (1) cup of water. I added some fresh honey and made it an even (2) cups.

The Recipe:

(1) part Honey
(1) part hot water
(2) parts cold water
(1) packet of yeast.

Heat the honey and hot water on the stove and bring to a boil. Then remove and add cold water. I then placed the pot in a ice bath until it was cool to the touch (about 75͒ F). Then add the yeast.

I placed this in a (1.5) litter wine bottle (I poured the remaining (2) cups down the sink) and placed an airlock on it.

Now it is bubbling. There are a lot of recipes but this seems to be the simplest by far. I'll let you know how it comes out in a couple of months.

Wednesday, August 9, 2017

Walkaway Splits - Right & Wrong

"If a job is worth doing, it's worth doing poorly first." - Joel Salatin

All of my hives at Dr.D's are spaced 18" apart in all directions


Work and weather have stifled my beekeeping but it hasn't stopped me completely. Saturday, my wife and I went out to Dr. D's place and split Hive-B.1 & Hive-C. This gives me (10) Hives and (3) Five-Frame-Nucs.

However, while making my splits, I wasn't thinking and therefor I made two different kinds of Walkaway Splits.

Hive-B.1 was split by taking the top box off and placing it on the new location. Then I made sure that box was filled with eggs, pollen, and honey. Of course a lot of the bees will return to the original location, so I shook (10) frames of bees into the new box in hopes that at least half of the bees might stay. This will probably do fine but it is not the best practice (in my humble opinion anyway).

Hive-C was split perfectly. I moved the whole hive to the new location and then placed a box filled with eggs, pollen, honey, and two frames of nurse bees on the old location. All of the field bees will return to the original location and that will ensure there are enough bees to fight the dreaded Small Hive Beetles. That is, in my opinion, the best practice for making a walkaway split.

All four of the hives were given eggs, pollen, and honey so that no matter where the queens ended up, the other half of each split would have everything needed to produce new queen cells.

Also, if you notice in the graph above, I did not use the VSH eggs in these splits. Hive-C is my oldest and most resilient hive, so I wanted to keep that genetic stock in my yard.

Hive-B was a swarm that just took up residence in an empty box in my apiary but that queen has proven over the past couple of years to be resilient and gentle - again, good genetic stock.

The VSH queen is the mother of all of the hives at my house and will be the root stock of most of my grafts but it is important to keep diversity in breeding and so that is why I chose to make my recent splits without VSH eggs.

The last thing I did was to shake 5 frames of bees into a Starter Hive (Hive-VF). The Five-Frame-Nuc has a screened bottom and no exit. I also placed a hive top feeder on it and then made brackets so the lid could be secured in place. At the end of the season I will give this box a queen and enough resources to survive the winter.

So with this addition and the (3) hives at my house, I am now equipped to graft at will -- well as soon as the rain stops.


Monday, July 24, 2017

The Queen Is Dead - Long Live The Queen

"Death is but a doorTime is but a window. I'll be back." - Vigo the Scourge of Carpathia, Ghost Busters II


I got up early Saturday morning to find all the caged queens had died - though there is still the sole survivor in Hive-VE that I didn't cage. Given each queen cost about $30 (if sold), I lost $240 worth of queens. Oh well.

Time is marching on and as of now, I figure I have about (9) weeks left till the end of the bee season in the Delta. I think that is still enough time to master my grafting technique.


It has now gotten too hot to work much in the afternoons. However, I still need to go to Dr. D's and get a few pounds of bees to start my mating nucs and to bolster my Starter Hive-VD giggle giggle. I'll force myself to do that on Wednesday (if my truck is out of the shop by then.) Once that unhappy task is done, then all of my grafting can be done at the house.


Thursday, July 20, 2017

Queen Cages: (4) living (3) Dead (1) Stillborn

Just a note: The Queen Cells I caged Monday have hatched. As stated in the title, (3) are dead - the cause of death is unknown but I suspect starvation.

This has been a hard year filled with ups and downs. However, I take these setbacks, not as failures but as lessons. This lesson is easy: Queens are fragile and, no matter the weather or life conditions, the queens must be systematically dealt with.

I knew I should have checked the queens on Tuesday but I let the heat keep me inside. Yesterday it rained and I took that as an excuse to again avoid the extreme heat (92 degrees - 60% humidity - 105 heat index) - though I did at least check the queens.

Of course being a better beekeeper doesn't mean I have to have a heat stroke. If queens are fed, they can be kept caged for a week before mating them (They must be introduced to the hive the same way that a mated queen is introduced). Yesterday I dripped a little honey on each of the four remaining queen's cages - Noah is going to do the same today while I'm out of town. Then Saturday, I will get up early and get my beekeeping done before the heat sets in.

The two lessons here are:

1. Pre-plan all queen rearing activities.
2. Regardless of the weather, the show must go on.


Tuesday, July 18, 2017

Miller Method - (8) Cells and (1) Virgin Queen

"You can't always get what you want but if you try sometimes, well you might find, you get what you need." - the Stones

I miscalculated the birth of the queens. On my queen rearing spreadsheet, queens hatch at (16) days - however, that is from the day the egg is laid. The queen actually hatches just (13) days after she is grafted/started.


Luckily I realized this yesterday and was able to rescue about (8) cells. There was a beautiful virgin queen milling around on the frame but she had just hatched and had not had time to begin her executions.

There were two opened queen cells but there were still (8) sealed ones. I used a knife to cut the cells out and then placed them in wire cell protectors. I said "about (8)" because I cut one cell a little close and opened the rear of the cell. The queen inside was still white but was moving. I pinched the end closed and then placed her at the far end of the cell bar so I would know which one she was. Maybe she will make it but I doubt it.

The upside is that on July 27th, I should have at least (7) newly mated queens plus the one I left in Hive-VE. Of course I am pleased that the Miller Method worked but I can't count this as a queen rearing victory as it is not suitable for commercial use. Until I successfully start breeding queens using the grafting method, I am still just a hobbyist.

I did place the queen cells on the bottom of the same bar I use for grafting. This kills two birds with one stone: it lets the bees polish the cups while holding the new cells. On Wednesday I will make (9) mating nucs and place the (8) cells in them. I'll make (9) in preparation for upcoming grafts.

I checked Hive-VD (giggle giggle) and it is doing well. It has two frames of bees in it and while there are still beetles, they seem to be held at bay. I did take the time to crush all the beetles I saw - I think this method (though time consuming) is actually fairly effective.

At this moment, I feel like things are starting to come together.

Monday, July 17, 2017

Chickens Day 1

“Far better it is to dare mighty things, to win glorious triumphs, even though checkered by failure, than to take rank with those poor spirits who neither enjoy much nor suffer much, because they live in the gray twilight that knows neither victory nor defeat.” 
― Theodore Roosevelt


Saturday I bought five Barred Rock chickens - that's not accurate - I bought five Barred Rock pullets or chicks. This means, that the chicks are so young that they can't go outside for two months.

They have to be kept in the house under heat at 95-degrees for the next four weeks. They must be fed special starter feed. So by the time they are old enough to eat beetles, my hives will have either overcome the beetles on their own or perished. 

What have I done?

"If a job is worth doing, it's worth doing poorly first."  Joel Salatin

I'm on the proverbial fence when it comes to Joel Salatin but I like the logic of this quote. I wanted chickens because I think they might help with the beetles but the more research I have done, the more I think that other livestock might be part of my future as sort of an insurance policy against bad bee years.

Of course I live in town, so live stock is problematic. Nonetheless, I need to get my feet wet and, as they say, Chickens are a gateway drug. 

I have a lot of plates in the air already. I work full-time as a Safety Man, I teach part-time, I am trying to get my bee business going... there are also the family obligations of course... not to mention I have two pet projects that I work on when I have time (my next novel and mechanical puzzle that I hope to one day patent)... now I have chickens. Only time will tell if this is a mistake or the first step in a new direction.

BEES:
Hive-VD giggle giggle
is still alive

My grafts from last Wednesday did't take. However, there seems to be a good reason - It turns out that Hive-A.1.VHS already has a queen in it. I didn't find her but there are four frames of brood in the hive. We made the split on June 7th. So when we first moved the hive we assumed it had a queen but on inspection, there was no sign of eggs. It had only been (21) days so that makes sense. Nonetheless she is laying now.

This is a good thing. Sure I didn't have any successful grafts but I did get some grafting practice. Now this Wednesday, I will get to try it again.

On a side note: This weekend was hotter than midget porn - mid 90's with 80% humidity. Saturday, I worked in my backyard apiary for about an hour then commenced digging post holes for my new mating nuc stand. The roots where thick as a Delta welfare line and by the second hole I had broken my shovel. Tired of the heat and drenched in sweat, I called it a day. 

Sadly, Sunday I accomplished even less. This weekend the heat won.