
Showing posts with label Woodwork. Show all posts
Showing posts with label Woodwork. Show all posts
Monday, October 7, 2019
Monday, January 28, 2019

Monday, January 14, 2019
Building Beehives – Time is Money

This year, I plan to make a Vlog series on how to start
beekeeping for zero dollars.
I have built hives from old pallets. When people hear that,
they immediately start posting comments about chemicals in pallet wood. Well I
have built about 12 hives from pallets and they are all doing fine. I simply
made sure that the pallets were clean and unpainted.
However, if you have ever tried to disassemble a pallet, you
know that it is a time sucking, board breaking, pain in the ass! So if it is in
the budget, it is much easier to just buy lumber.
In a previous blog, I showed how deep supers can be built
from 1x4’s. However even with that, I estimate that the lumber for 63 hives
(top, bottom, one super, and ten frames) will cost $851.61.
Why 63? When trying to figure out how to cut the wood with
the least amount of waste, 63 was the magic number.
Similarly, I estimate 63 supers with ten wood frames each would
cost $592.00. These are of course only estimates and the actual cost so far
seems to be around 120% of that number.
My goal for 2019
is to make 100 hives with two deep supers each. I already have enough equipment
for 25 hives (17 of those have bees already). That leaves 75 hives. Even conservatively
speaking that comes out to $1718.58 worth of lumber. Ouch!
I produced enough honey in 2018 to cover that cost but I’m
cheap and I’d rather keep some of that money for other projects.
So when I came across (18) 6’x2’x2’ crates made out of
quality yellow pine 1x4’s and ¼” plywood… well the cheapskate in me couldn’t
pass it up.
I spent seven hours yesterday, with the help of my nephew
Zane, disassembling the crates. Pulling the boards apart was easy but removing
the wood staples from the plywood was monotonous to say the least. Over the
course of seven hours I removed 2160 staples. I still have six more crates left
to do but I already have over 400 board feet of 1x4’s ($250 value) and 32 2’x4’
sheets of plywood ($175 value).

Once I have disassembled the remaining crates, I will have saved nearly $700. That
makes my time (and Zane’s) worth $66.67
an hour.
“A penny saved is a
penny earned” – Ben Franklin
One last note on my nephew, Zane. That 13-yo kid produced as
much work as any adult could have. I started working 2 hours before he arrived
and disassembled 2 crates but once he was there, we were able to do 2 crates an
hour – cutting my work in half. He did all of this for free but in the end I
gave him $20 as a humble way of saying thanks. I couldn’t be more proud of that
kid.
Monday, December 17, 2018
Blueprint - 1x4 Deep Beehive Super

"A Goal without a plan is just a wish." - Antoine de Saint-Exupery (That's is my new favorite quote!)
As I mentioned in an earlier blog this super is built with 1x4's and cost about $9.50 to build. Using nine 1x4's 8' long will give you four deep supers with almost no waste.
Here again is how you cut them for optimal efficiency:
Cut Board One: (3) 19 7/8" and (2) 14 3/4"
Cut Board Two: (5) 14 3/4" and (1) 19 7/8"
Cut Board Three: (4) 19 7/8" and (1) 14 3/4"
Then repeat two more times.
Keep the scraps for handles.
You will also need a scarp of wood to make the (3/8 x 5/8 x 16 1/4") end strips.
One thing I did different this weekend was that I bought some untreated cedar fence slats for the end strips. They were about 6' long 6" wide and 11/16" thick. I planed them down to 3/8" using my table saw (in what was obviously an unsafe manner). Then I cut them into 5/8" strips and cut them down to length.
It's a small bit of wood but maybe the cedar will keep the moths out.
Helpful tip: If you are fighting your saw, it might be time for a new blade.
While cutting the cedar, I felt like I was date raping my saw. On inspection, I found that the 5-yo (overused) blade was missing the carbide tips on some of the teeth (or at least they were worn to nearly nothing). I replaced the blade and it cut like butter. I know I should have known better but it's not like you have to replace the blade that often.
If you like the plan or use it, leave a comment and let me know how it worked out for you.
Monday, December 3, 2018
Cheaper, Stronger, Easier Beehive

If you've read my blog at all, you probably know just how cheap I really am. When I started to rebuild my apiary, I started off repairing old rotted boxes. When I ran out the old boxes, I began building boxes from pallets.
Eventually it became a point of pride that I could build my business without taking money from my household budget.
Now that my hives are making a little money, I am reinvesting it. I have finally upgraded to building hives with "store-bought" lumber but 1X12-8' are more than $16 each and only make a single super.
So capitalizing on the lessons learned building hives from pallets, I am sticking with 1X4-8'. If you buy nine 1X4's you can make four deep supers. This is the cutting pattern for minimal waste:

 Cut Board One: (3) 19 7/8" and (2) 14 3/4"
Cut Board Two: (5) 14 3/4" and (1) 19 7/8"
Cut Board Three: (4) 19 7/8" and (1) 14 3/4"
You will have to stagger your joints. I found a really easy way to do this. Using some scrap wood, cut two strips per super that are 3/8" X 5/8" X 16 1/4".
Next, on two of your 19 7/8" pieces cut a notch in both ends that is 3/8" X 5/8".

Assemble these two pieces to the strips. From here on all you have to do is glue and nail the rest of the boards in place.
When the whole thing is assembled. Set your table saw to 9 5/8" and trim the bottom of the super. This will make a nice square bottom. Lastly, place a handle 1X2-4" on each end of the box so that it overlaps the top two end boards.
That's it. It took me about an hour to build each super. I need 200 supers for next year, so that means 200 hours of work just on the boxes. I think a little part of me just died.
"The best time to plant a tree is 20 years ago. The next best time is now." - Chinese Proverb
Monday, November 5, 2018
Hive Top Feeders - How To Build

In the first picture you can see the finished product. It is simply a 1x4 box with a #8 hardware cloth bottom. Before it goes in the hive, it will be lined with dryer sheets and then filled with cedar chips - hopefully this will keep out pest.
 Now before we get started, I cannot emphasis how helpful Jig's are in the workshop. Because I already had a Jig built for cutting Supers out, I was able to cut up (15) 1x4's in just 15 minutes.
 Later, as I began assembling my outer frames, I was struggling and losing time - until I tacked a board to two sides of one of the assembled boxes and used it as an assembly jig. In the same amount of time it took me to build two boxes without the Jig, I was able to assemble the other (13).
Take the time to build your Jig's - the time you spend building the Jig will pay dividends for years to come.

The required items are:
(2) 1x4's cut 19 7/8" long
(3) 1x4's cut 14 3/4" long
(2) scrap 1x4's cut 5 1/2" long
#8 Hardware Cloth 16" x 23"
"If you would be wealthy, think of savings as well as getting" - Benjamin Franklin
Now I needed to build (15) feeders. I found that if I cut (3) 8'-1x4's I can get (8) 14 3/4" cuts and (8) 19 7/8" cuts with little to no waste. (See Picture)

From (1) 8' - 1x4, I can get (6) 14 3/4" cuts.
So (2) 19 7/8" cuts plus (2) 14 3/4" cuts make the outer box.
Then the (2) 5 1/2" scrap cuts are placed at one end with a gap in the middle.
Then take the third and last 14 3/4" cut and rip (2) 3/8" pieces off long way. (1) strips will be used as a cross bar support for the screen. The other (1) will be cut into (4) even pieces at 22.5 degrees to create the enclosed ladder.
Finally staple in place the #8 Hardware cloth across the bottom and trim off the excess. Then trim that remaining piece to 3" wide.
Now assemble the (4) ladder pieces two on each side and wrap with the hardware cloth leaving a 1/2" exposed on the bottom side for an entrance. Place the ladder in the gap - making sure that there are no gaps that might allow the bees to enter the feeder outside of the ladder.
Now turn the feeder over and cut the hardware cloth out of the 3" x 3/4" hallow space so the bees can access the feeder.
"Winter is Coming" and this coming Saturday will likely be my last chance to slip my feeders on before the temperatures drop into the 50's. Tic-toc, tic-toc.
I hope you find this blog helpful. Please leave a comment if you have any questions.
Monday, September 17, 2018
Bees, Beetles, and Mosquitoes... Oh My!

The super in the picture is about 13 years old and has been badly
treated. My latest act of malevolence was when I dropped the box about 8" filled with honey to knock out the last of the bees. Not only did this break the ears off of most of the frames but it made, the already weak corners, come apart.
 So I used 1/4 hardware cloth to repair it. The inside lip was also rotting away, so I used the wire to make a new ledge. If it works, great. I'll get another season or two out of the box. If not, nothing lost.
One day, and I hope soon, I will have enough return on my honey investment to buy good wood and plastic frames but until then... waste not, want not.
The 5 frame nuc I made has about 7 to 10 queen cells in it. I moved it out to Dr.D's Saturday. It seems fairly strong and I think it might just make it through the winter - if the beetles don't kill it first.
BEETLES! All of my hives are filled with beetles. Luckily the hives are strong and are keeping them beat down but the beetles are there and just waiting for their chance to destroy the hives.
Wednesday, I will place a swiffer sheet and a Fat Bee-man Trap (though I am not convinced they work) into each hive. I've also broken down and ordered beetle blaster traps for all 20 hives ($48 with S&H) and will put them in as soon as they arrive - they work great but are too pricey.

I think the apocalypse is near and the mosquitoes might be the fourth horseman. I've never seen mosquitoes this bad before. This pictures shows my pants leg but I was covered from head to toe. And it wasn't just out in the country - I must have killed 30 or more in my house that flew in as I came in the front door.
Maybe these incredibly hot days we are having this week will kill them back - I hope so anyway.
Harvest Continues: Well I've harvested 8 deep boxes and have gotten about 25 gallons now. I still have about 12 boxes to go.
Monday, September 10, 2018
We Harvest Honey When It's Warm For A Reason

The picture shows the stand I built for my honey extractor, so that I could fit the 5 gallon bucket under the bung hole.
I used a 4x4 that was actually only 3.5" tall. On top of that I used some scarp 1x4 material to make it a total of 4 1/4" tall. I attached all of this to a scarp piece of 3/4" plywood I had in the shop that was 28"x36".
I pre-drilled the bolt holes and used heavy 1/4" wood screws to secure the extractor to the stand. It worked very well and reduced the wobble of the extractor by about 75%.
Now that is all of the How-To part of my blog... what follows is my struggle to get the led out of my ass. Feel free to stop reading here.
 Maybe I'm just old... Maybe I'm just out of shape... Maybe I'm just lazy... I really don't know. However, Saturday I was so exhausted that I could hardly move. By Sunday, I felt fine and I was able to finish the work I started on Tuesday.
That's right Tuesday. As I said in the last blog, it was late Tuesday night before I got all of the supers in the house. So I had planned to extract them Wednesday. The trouble was, that I left the honey under the A/C all night and it became so thick, it wouldn't come out of the wax. So I placed a heater on it Wednesday.
Of course I work out of town on Thursdays and Fridays so those days were out.
Saturday I was so lethargic that I felt like I hadn't slept in days. I had stayed up the night before till midnight but I slept in till 9am - so that didn't seem like the problem. I also crashed my diet Friday by eating a family size bag of M&M's... DON'T JUDGE ME, YOU DON'T KNOW ME! Anyway, Saturday might have been a sugar crash. Whatever the reason, I didn't do anything productive that day either.
That brings us to Sunday. Now I had the heater going (which worked great). I also had the extractor spinning and with the new stand, it was spinning about 20 frames an hour. I also had the washer going in the adjacent room since I had gotten honey on my beekeeping jacket.
So as I was finishing up at 7:30pm, my wife came home from work and I kissed her. I'm so in love with her, that I saw a flash of light. I kissed her again, and again there was a spark. She felt it too... or at least saw it.
"Did you see that?" she exclaimed. "Was that the refrigerator?"
It was. The old wiring in my house couldn't take all the appliances... or maybe the little fan next to the sink had gotten wet while I was doing the dishes (I'm a big multi-task'er)... whatever the reason, the outlet blew.. Thankfully there was no fire - I checked on it all night and hardly slept but no fire. So the outlet will need to be replaced - add it to my list of things I need to fix.
Well, it took most of the afternoon but I got all 5 boxes of honey extracted and came out with about 12 gallons of honey - 16 gallons total so far this season. I say about, because the sieves hang down in the bucket so that I can only fill them to about 4.5 gallons full.
So that's my story... weather has me down until the weekend, so until then, best wishes faithful readers.
Tuesday, May 1, 2018
And the splits just keep on coming
"By prevailing over all obstacles and distractions, one may unfailingly arrive at his chosen goal or destination," Christopher Columbus ... Big talk for a man who thought he was in India.
If the following blog goes off the rails, forgive me. I woke up at 3:00am with my "Night Dreads." If you're not familiar with my "Night Dreads", it is the phenomenon where I wake up in the middle of the night and begin worrying about the most ridiculous things. Last nights night dread topic: How I would change my life if I somehow traveled through time and was 17 again. At 5:20am I concluded that I would have to go back to age 16 to make any real change but that I would have started building bee hives the moment I arrived in 1990! "There is a fine line between genius and insanity. I have erased that line." - Oscar Levant.
THE PLAN:
This past Wednesday I had planned to build 10 lids & 10 bottoms and Saturday I would make my 10 splits.
THE OBSTACLES:
When Wednesday came, I allowed myself to be lazy. If failure was a sickness, laziness would be the symptom. I instead told myself, I would build them Saturday and make my splits Sunday.
Well Thursday, on my way to work in Vicksburg, the water pump on my truck began leaking - like a sieve. There was a lot stress and drama involved in getting home but by 6:00pm Saturday, I made it back.
Sunday I bought the new seals for the water pump and while I waited for the truck to cool down, I made the lids and bottoms for the splits. I then spent the rest of the day taking the whole truck apart to put in the seals. Thanks to YouTube, the job went smoothly but it took all day.
So yesterday, Monday 4/30/18 at 5:00pm (after I got home from work) Noah and I went out to Dr. D's to make splits.

THE SPLITS:
We only had time to make 4 splits - A,B,C,D. We started with D and found 5 frames of swarm cells. So we removed them from the box and divided them amongst the other splits.
On split C we found that the box was full of honey but no brood, so we decided to put a frame of queen cells in both boxes. Figuring that it might be missing a queen or just need a better one. However, when we retrieved the the frame with a queen cell, the cell was open and empty. Noah checked the other frames we had set to the side and there she was - the virgin queen. So we grabbed her (gently) and popped her in the hive. So as you can see the splits were just in the nick of time.
I worry that there might be other hives on the verge of swarming but I just don't have time to do anything about it. If all goes well, then Saturday, I will build boxes and wax the old plastic frames. Then Sunday, I will continue with the rest of my splits.
For now, HIVE COUNT: 18 Hives.
Monday, April 23, 2018
2018 The Future Looks Bright

I do my best to keep this blog purely focused on my beekeeping but something strange happened last week that I don't want to forget - so indulge me and then I'll tell about my extraordinary beekeeping year thus far. Or just skip down past the italic part.
On Wednesday, 4/18/18 I woke up singing the 90's song "If I had a Million Dollars" by the Bare Naked Ladies. I like the group so that's not really odd.
However, the first thing I heard when I got to work was a conversation that had this line in it, "You got me F***ed up talking about what I would do with a million dollars." Not an unusual conversation given I work in a casino.
Then I went to Walmart after work and the overhead speakers were playing... "If I had a Million Dollars" by the Bare Naked Ladies! So I drove to Arkansas and bought a lottery ticket - and, of course, I didn't win.
The time between when I bought the ticket and when the numbers were drawn were filled with pure childlike daydreams. I imagined all the things I would buy, the way I would invest, the people I would help, and those I would shun. I also thought how empty all of my future achievements would be and how lonely my wife and I might end up. In the end, I wasn't even disappointed not to have won the lottery.
I've spent a lifetime looking for signs and have never found one. Nonetheless, if this year proves to be an epic success, then perhaps I'll look back on this day and say, "All the signs were there."

What a great bee year so far:
 It has been three weeks since I made my splits and they are all doing well... no, they are all doing awesome!
I didn't realize it had been three weeks until just now. I don't have a great excuse, other than the weather has been fairly cold and rainy. Not to mention that last week, Dr. D's father died - I keep my bees at his family's country homestead.
However, that is all spilled milk. Saturday, I went to Dr. D's and my bees were busting at the seams and about to swarm.
I moved 5 frames of queen cells to a new hives with nurse bees (Hive number 14). I would have split 10 of my hives but I didn't have enough lids and bottoms to do it.
In the other hives, I did my best to cut the queen cells out. This is always risky, as you might miss one.
 |
| Queen Cells |
If all goes well, then Wednesday I will make lids and bottoms and Saturday, I will make 10 more splits.
Hive Count: 14 Hives.
BTW: I had a heart scare two months ago and so I have been meditating in the mornings before work to lower my blood pressure. Well, the bees were fairly cantankerous at first on Saturday but then I took a minute to control my breathing and meditate, the bees calmed right down. I suspect my agitation was putting off pheromones and once I relaxed so did the bees.
Monday, February 12, 2018
The Pallet Beehive

I have been making beehives out of old pallets. I've built about 14 now. I had planned on building 100 but the process is just too time consuming.
However, if you are broke and want to get into beekeeping, then this is a way to build something great out of something free.
Now before I get started, there will be a lot of naysayers who will start talking about poisoned pallets and the such. This is not a real issue. In fact, I have used the unpainted type of pallets and have not had one ill-effect from them... well other than possibly Hive Beetles but I fixed that too.
The only three things you need to do to use pallet wood is:
1) Stagger the joints on the front vs the sides. I do this by simply cutting one of the side boards in half longways, and then placing half at the top of the box and the other at the bottom.
 2) Fill in ALL of the gaps. I think failing to do this might have contributed to my hive beetle problem last year. Since the pallet boards are roughly 3.5" wide, it takes three to make one deep box. If done poorly or if the wood is not exactly straight, then there will be cracks. Simply fill these with glue and sawdust.
3) Work from the inside dimensions. Since the thickness of pallet wood is notoriously inconsistent, you have to work from the inside out. This is easier then it sounds. I cut the front/rear boards 14 3/4" long (this ensures the short side is correct).
Then I cut the long sides 19 7/8" - however, when you assemble the box, adjust then end boards to a space of 18 3/8". You may have a little wood sticking out past the ends but it won't be much and will help to keep the stacks even as you add supers later.
 |
| Mabel got cold but refused to quit |
By the way, I already had all my pallets taken apart, so it only took me 2 hours to build 3 deep suppers.
As for me, I think I am going to just start buying lumber. I have a little more money this year than I have had in the past, and so the expense won't be too much of a burden. The time saved will be more than worth it.
The most important thing about this blog, is that I finally got back in the wood shop and back to working towards building my bee business.
Monday, December 11, 2017
Linda Passed Away

I have been overwhelmed as of late. I can't put my finger on the exact cause of this feeling but it is there just the same and it has been crushing my productivity.
Nonetheless, Monday (12/4/17) I finally managed to winterize my hives. It went very well despite working in a light misty rain. However, it was warm and the bees were agreeable.
 I did not merge hives B.1.1 and VSH as planned. I made all the preparations - I reduced B.1.1 to one single super and placed paper over it. However, when I opened the VSH hive it was full of both bees and beetles.
B.1.1 is small and should make it through the winter but I doubted it could survive another beetle attack. So I closed up both hives and left them separated.
Only time will tell if this was the right decision.
On a personal note: My mother-in-law past away on Tuesday (12/5/17). She has been sick for years with a mental condition that mimics dementia and over the past couple of years she had required full-time care. The task was divided amongst my mother, nephew, daughter, son, paid sitters, me, and my wife (the order of those names gives the magnitude of contribution with about 90% of it falling on me and my wife).
It has been exhausting. Her passing feels like a blessing but saying that feels selfish and cold. My wife has now lost both of her parents in the past 18 months and that breaks my heart for her. Just the same, I am sure that the reduced stress of caring for her mom will actually make her life infinitely better - once she has finished grieving of course.
I don't know if my feelings of being overwhelmed are significantly linked to my mother-in-law or if I am just lazy. The weeks to come will answer that question. Either way, 2017 is coming to an end and Spring will be here before you know it.
I have two goals for next year: 100 hives and mastering queen rearing. I think I'll make a chart to hang in the shop and mark off each hive as I build it - then do the same in the spring and mark them off as I fill them with bees.
BTW: My chickens started laying eggs the day before Thanksgiving and I am getting an egg every day now.
Wednesday, November 1, 2017
Predator-Proofing my Chicken Tractor

My first three months of chicken husbandry was a lot more work than it needed to be. Taking the chickens outside every day and carrying them back inside every night was a hassle and quite time consuming. Thankfully that is behind me.
It took nearly three months to get around to it but I finally finished my chicken tractor. The original chicken tractor was done months ago but I wanted mine to be more predator-proof. So last Wednesday, despite being run down from two weeks of long office hours, I got a second wind and four hours later, it was done.
The extra step was to attach out-rigging to the base of the pen to prevent predators from digging under the edges. I think this is a pretty good idea.
 |
| Chain link hinges |
The out-rigging was made out of four pressure treated 2x4x10' that I ripped down the center. My coup is 4x8, so the extra two foot of left over was used as the end pieces of the sides. The front and end is 6' tapering to 4' (truthfully, this happened because I meant to use 2x4x12' but it turned out to look great). The final diagonal bits were constructed out of scrap I had from the original coup build.
 |
| Upside-down showing the wheels engaged |
I also attached some wheels that I haven't used since the night I first put them on. The tractor is light enough that I really don't need them.
So that's my predator-proof chicken tractor. Leave a comment and let me know what you think.
Monday, June 5, 2017
The Return of the Queen - Long Live The Queen!
 These days I am much more reluctant to use the word "Miracle" when curiously great things happen. It seems lately every time I do, the next day it turns to crap.
That being said, I was amazed to find the queen that had flown away last week had returned. It turns out that it really isn't that uncommon. In fact, when I looked it up this morning, the question came up quite often. This is what Michael Bush said on Beesource.com back on 5/14/2011:
First let’s look at what to do if the queen flies. The first thing you do is stand still. She will orient on you and probably find her way back. The second thing to do is en-courage the bees to guide her back with Nasonov pheromone. To do this, take a frame out that is covered in bees and shake them back into the hive. This will cause them to start fanning Nasonov. Third, if you don’t see the queen fly back in (be watching and you may) then wait ten minutes with the cover of the hive off so she can smell the Nasonov. If you do these three things the odds are very good she will find her way back.
If you didn’t do those things, there is probably a little better than 50/50 chance she will find her way back anyway.
So dear friends, sometimes, they come back. However, I'm still worried that my queen might be damaged from the hairclip squish I gave her last weekend. Time will tell.
Moving On:
 |
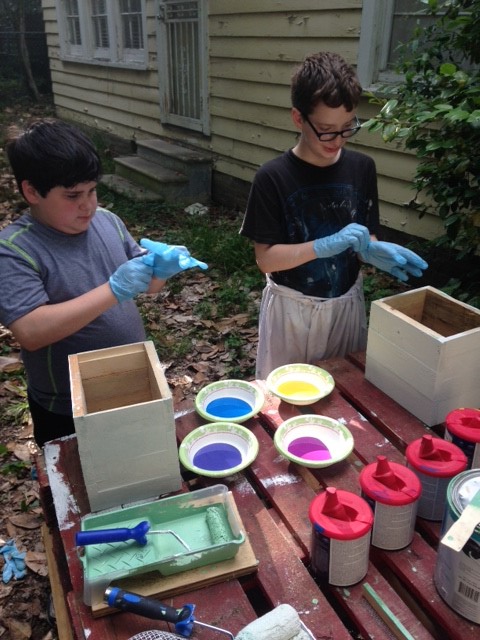
| It only violates Child Labor Laws if I pay them. :) |
Nonetheless, I invited my nephew Zane over to help me. I did this on a whim - I think subconsciously I was trying to share the misery with anyone who would be gullible enough to help. He in turn, invited his friend - probably for the same reason. However, since I'm not a complete dick, I decided to make it as fun as I could. So first they had to paint the boxes with primer and paint (I did the last coat to make sure all the spots were covered)... then I let them finger paint the fronts.
 They actually seemed to enjoy the whole process.
I didn't take any pictures of the ones they finger painted but to be honest, they all look like shit. Of course that was after I had to shoot down several of their 11-year-old ideas. The top ones included, homages to their favorite famous YouTubers, a picture of a hand giving the finger, and other general curse words. Silly me, I expected cartoon bees and flowers rather than belligerent graffiti!
Luckily, they actually enjoyed painting the boxes solid more than finger painting and so they only defaced five or so of them. The rest I painted with different solid colors as originally planned.
That was Saturday. Sunday I built five frame nucs. That isn't totally true. I actually spent most of the weekend playing video games. I am sure Joel Salatin (Author of You Can Farm) would take great joy in chastising that epic waste of time. He would be right. If fact, despite the fact that I love video games, I rarely play them for fear of being sucked into them for days on end. I've since asked my son to keep his damn video games in his room since I can't be trusted!
 However, the five frame nucs were actually a revelation. The evolution of my pallet repurposing project has made a huge breakthrough. The sides of my hives are now built with (3) 1x4's (which are actually 3/4"x3 1/2" wide) - that makes the side 10 1/2" tall. Then I make the fronts out of (4) one-by strips that I have ripped down to 2 1/2". This locks all the boards together. When the finished product is put together, I trim it down to 9 5/8"on the table saw to give it a nice flat bottom.
The best part is that I ripped all of the material out for (5) nuc boxes in about an hour and could assemble them in about (15) minutes. That sort of production could make it possible to manufacture all the hives I need in just a matter of days rather than months.

As I mentioned in my last blog, I am considering going to all (5) frame nuc boxes rather than standard (10) frame hives. Don the Fat Bee Man promotes this idea and I can see the benefits - the lighter boxes not being the least of these.
Wednesday, Noah and I will be heading out to Dr. D's place to do several walk away splits, as well as fixing up a couple of five frame nucs to bring home. I will also be transforming Hive-D (the one at my house) into a triple stacked five frame nuc. This will give me (3) separate nucs rather than just one hive at the house. This will give me more options for my breeding activities.
Monday, April 10, 2017
No Eggs and the Night Dreads

BTW: I got (6) stings this weekend but they were all well deserved for doing stupid shit.
I'd like to point out that I have a vast amount of beekeeping knowledge. I’ve studied beekeeping
books and videos for years and I can answer most questions people ask. I’ve
also gained a lot of experience through my own screw ups and I’m pretty good
about only making the same serious mistakes once. That being said, there are so many
times I look into my hive and feel as dumb as a dog looking at a doorknob.
We did manage to find both of the new queens out at Dr. D’s
place but no eggs. At (43), I may need new glasses but I couldn’t find any eggs and I
doubt all three of the new queens are just not laying. They may also need more
time. Either way I felt defeated.
Once all the bees were fed, we called it a day. At home I
did my best to waterboard my disappointment with a couple of bottles of Rascato
but with very little success. So when all else failed, I went to bed.
The night dreads – that’s what I call it when I wake up in
the middle of the night and begin imagine the worse case scenario for my life. It's not just empty thoughts; I think about sick family members, money issues, work problems and so on but I also obsess about all the things that could go wrong. I know the whole thing is compounded by the fact that I'm half asleep but it’s hard to tell if I’m insane or if I’m just really stressed
out. I constantly worry that one day I’ll flip out like Leonardo Decaprio in The Aviator and my wife will just find
me in front of the mirror muttering, “It’s the future… it’s the future… it’s the future… it’s the future…”
Nonetheless, at 4:00am Sunday morning, I woke up and began
thinking about my beekeeping plans. Even if I could build (10) mini-nucs each
weekend, I could still only get about (500) built in time for next spring. To
make matters worse, at the rate I am splitting hives, I won’t be anywhere near
(100) full size hives.
That was when a thought came to mind that I have rarely ever
had about anything: “Maybe I should just quit.” It seems silly to think of it
in the daylight but at 4:00am it seemed like a good idea – for about a half of
a second anyway.
 I can’t give up – this is my Plan G!
 Plan A was Architecture but after designing a couple of dozen houses I got tired of designing other people's dreams. Plan B was when I became a fireman but the pay was so bad, I gave that up after about (4) years. Plan C was paramedic but that job is what sparked my anxiety issues. Plan D was offshore life but that dried up. Plan E was to become a writer but so far that hasn't panned out either - though I would gladly do that full-time. Plan L is to finish my degree and become a full-time teacher (I already teach part time). Around Plan Q is becoming a standup comic but my wife doesn’t think that shit's funny at all. And Plan Z is to keep doing what I’m doing as a Safety Man but that is far from a desired option. (Note: I'm only kidding about my wife not being supportive - she actually supports anything I want to do... she is awesome! It sounds like pandering but she doesn't read this crap.)
So giving up on professional beekeeping is not an option. Of course
reaching my goals this year doesn’t seem realistic either. That only leaves the
third option; do what I can and be content “if” I do my best.
So my goal is still the same: Master grafting, create (750)
mini mating nucs, and create (100) viable hives. However, that is my overall yearly goal.
I need to set more obtainable, short term goals. So I made the following
spreadsheet for this month and will do the same each month that follows for as
long as it is helpful.

Sunday, March 19, 2017
Mini Mating Nuc - Blueprint
 Mini Mating Nucs may be the most wonderful part of modern beekeeping. I say this, because so much of modern beekeeping has become completely standardized - yet there doesn't seem to be any standardization of the mini mating nucs. This gives the beekeeper a chance to experiment and discover without reinventing any wheels.
As I plan to breed queens this year, I looked online for a set of mini nuc blueprints but I didn't find much.
The Beekeeper's Workshop (TBW) had very nice plans for a four chambered mini nuc. You can find these plans on their website and on YouTube. I do plan to give these a try sometime but for now I wanted single nucs.
Don the Fat Bee Man has a great design as well (see his YouTube Channel) but in his video, the dimensions don't add up - and the plans are for a medium deep nuc (which might save a lot of wood).
Mann Lake sells a Styrofoam mating nuc but they cost $20 and are very small.
What I like best about the TBW four chamber nuc was that it could be stacked on top of a standard hive super. What I like best about Don's mini nuc was that it is made from scrap wood. I also like Don's better than TBW because it uses a half size 9 1/2" frame rather than 9 1/4" - this allows you to place two end-to-end in a full-size hive to draw out the wax. (You can do the same with the 9 1/4" but it makes a bigger gap.)
In my first attempt I divided the length of a full supper by half, I used 1x4 material, and used TBW 9 1/4" frame but this made the inside dimension of the nuc too short and didn't leave room for bee-space.
On my second attempt, I used the same outside dimensions but I used 1/2" lumber on the two ends (still used 1X4 material on the sides) and then I was able to use Don's 9 1/2" frames with just the right amount of bee-space.
I'm building these out of scrap wood. I use (3) - 1X4 on both sides (These are of course 3/4"X3 1/2") and I use (4) - 2 1/2"x1/2" boards on the front and (4) on the back (I ripped these boards from some 2 1/2"x3" stock I had). The staggered pattern locks all the boards together and makes a pretty solid box. I also use nail and glue on all my joints.
Now some beekeepers will freak out because all these little boards leave gaps and cracks. Relax! I found that if you brush each crack with a thin layer of glue and then just rub sawdust over them and into them, it all seals up tighter than Dick's Hat Band - I didn't invent this process but I like it!
So here is my blueprint - I drew it with Microsoft Excel and then imported it to Paintbrush so you will have to play with your print scale if you want it to be to scale. Otherwise, here you go:

If you have any problem viewing these plans, leave a comment and I'll email you a better copy.
Monday, March 6, 2017
Edge of winter 2017 – Time to try again
 |
| So this is my woodshop. Ain't it cool?! |
When last I blogged, things were going bad but then they got
worse. My father-in-law, Dale (who was my best friend) lost his battle with
cancer. The cancer was discovered shortly after he had the heart stent put in. It was a long fight and my wife and I never left his side. It’s been 9
months since he died and we still miss him greatly.
I did eventually find a job working for a well-known casino
back in 2/1/2016 (I won’t say the name due to corporate policies). After my
first year I won rookie of the quarter, Team Leader of the Year, and got
promoted to Regional Safety Compliance Officer. The pay is mediocre but I am
home 6 days a week and I get all the pallets I want.
As I mentioned in my last post, my big plan was to build hives from old pallets and to catch wild bees. So since December of 2016 I have been doing just that. It turned out to be far more work than I expected but I’m sticking to it. I’ve built 12 supers and 120 deep frames so far using nothing but scrap pallet wood.
Aside from the huge investment in time, there are two major
problems with using pallets for hives:
1.
The wood is not standard width or length… or
thickness! The last one being the worst part. I’ve overcome this issue by
building my hives using the inside dimensions rather than the outside ones – since that
is the part the bees use anyway.
2.
No matter how I dismantle the pallets I waste
wood.
a.
If you cut the nails with a saws-all then the
wood that still has nails embedded in it becomes unusable.
b.
If you pry the wood apart then, without fail,
half of the boards break. Nonetheless, this seems to be the best method. After
dismantling nearly 50 pallets, I am still working on reducing the amount of
broken boards.
What about my bees:
As of last month I have 6 very strong hives. 2 are at the
old farm and 4 are at the doctor’s place. (The Beast died last winter and it was a relief not to have to deal with those cantankerous little bastards anymore). The unusually warm winter has me
biting at the bit to begin my splits but all prudent advice says I should wait
until after Easter. So I am waiting. I have also purchased a VHS Italian Queen due to arrive at the first of April. My bees are strong but a little aggressive and I'm hoping the new queen will help to calm down future offspring.
Of course I had a setback:
Last year, I did three stupid things.
1.
I harvested too late. I usually harvest my honey
around September 3rd. However, it was freaking hot! So I thought to
myself, “Self” that’s me… I said, “Self, bees fly just fine when it’s 70
degrees out. Why don’t you wait until October and get the honey when it’s not
so damned hot?” So I did – and that is when I found out why you harvest when it’s
hot. The bees are fine at 70 degrees but the honey is thick and took forever to
drip from the frames. 10 frames took a week to drip using my gravity flow
extractor. Lesson 1: HARVEST IN THE HEAT!
2.
The second stupid thing I did was that I collected 2
supers of honey when I only have a 10 frame extractor. So the other super got
robbed before I could get the honey out of the first one – and it happened FAST! Those neighborhood
bees were like piranhas on a cow carcass. Lesson 2: Only harvest what you can
handle.
3.
The last stupid thing I did was hurt my back and
this changed everything!
In the book Beekeeping:
Practical Advice for would be Smaller holders, by Andrew Davies, it says
that there are two conditions that can prevent someone from beekeeping: Anaphylaxis
and a bad back. I have the latter. So when I attempted to shake the bees from a
full deep super, I reinjured my back. I realize everything about that sentence
is wrong. Why am I gathering honey in deep supers? Why did I try to shake bees
out? Why was I doing any of that with a bad back in the first place? For all
those answers please reference the title of my blog series.
Just the same, it made me reconsider beekeeping altogether and,
somewhere in that deep contemplation, I decided to focus on Queen rearing
rather than honey production. So for the past six months I have been studying
books, blogs, and videos. Hopefully before this month is out, I will try my
hand at my first grafts. I am also using the rest of this year to split my
hives, master my grafting technique, and practice producing queens on a
schedule.
I’ve designed and built my first mini mating nuc using scrap
material – I’ll give details and post a blueprint in upcoming blogs. I have
also begun making queen cell cages at night while I watch TV – it only took two
nights before I fumbled the soldering iron and branded my hand... I’ll also post that story as well as ways to prevent it from happening again.
Well this blog has gotten pretty long so I’ll end it here.
See you soon.
Sunday, September 6, 2015
Summer of 2015 Final Tally: 7-Hives
 |
| Dale (father-n-law) moving supers |
Well, it is now the end of summer and time to tally my efforts for the 2015 year. No suspense, the answer is 7 hives.
So here is a summery of this years splits. I started with 4 hives but one of those died shortly after the spring started.
Then I had 3-hives: so I split them into 6-hives but I didn't know what I was doing so only 1 made it.
Then I had 4-hives: so I split Dr. D's hive three times but one died. So then I had 3 at the Old Farm and 3 at Dr.D's place.
Then I had 6-hives: so I bought 8 queens and split the hives into 14 total hives. 5 of those queens died right away (or swarmed) - leaving me with 6 at Dr. D's and 3 at the Old Farm.
Then the moths killed one of my original splits and one of my newly queened hives swarmed. So that left me with 7-Hives for 2015. Of course I still have a month or two to fortify these 7 but I am hopeful they will all survive the winter.
LESSON LEARNED:
I think the biggest set back this year was due to the bleached frames I put in the hive. I did this on the advice of another beekeeper. The actual advice was to bleach the frames then lightly coat them with new wax - however, I didn't have any wax to use so I just bleached and cleaned the frames. The bees did not build on any of them. This made the hives inhospitable and the bees just left.
Of course the other thing I have learned is how to properly identify brood. My first splits failed because I simply didn't know what I was looking at. I am confident that I did not put enough young larva in the splits and therefore the bees could not raise new queens.
Both of these issues will be resolved for next year.
THE HARVEST:
The original hive at Dr.D's place has 100lbs of honey in it - however, I accidentally put mite chemicals in the hive with the honey and that made it unsuitable for harvest. I will distribute this honey between the hives at the end of September. The Beast (at the old farm) had 100lbs but when the hive fell over, the honey was robbed. All the other hives are barely filling two supers deep which they will need for the winter.
So my total harvest consisted of one single frame of honey I took from a hive at the Old Farm - barely a mason jar full.
CONCLUSION:
After a hard year of ups and downs, I have not become a beekeeping mogul just yet. I have however doubled my hives. I think next year will be a much more successful year.
PLAN FORWARD:
What is my big plan? PALLETS and WILD BEES! I will explain in much more detail later but I plan to recycle wooden pallets to build supers. I then plan to lure feral bees in with lemon grass oil. I already have a area to quarantine these hives until I can get them disease free.
At the same time, I will also split my existing 7-hives during the spring. I think I will split The Beast into 6 even hives and requeen them with Italian queens. I will split the other 2-hives at the Old Farm into 4 each (if they are strong enough). I will leave my strongest hive at Dr. D's un split in case this all goes wrong but I will split the other 3-hives three times each (by removing 2 frames of brood and bees in March, April, and May.) For a total of 24-hives. With what I have learned this year, I think this is doable.
If I can pull this off in 2016 then in 2017 I should be able to divide my hives into a large enough number to turn a profit. Only time will tell.
PERSONAL NOTES:
I did not get the USDA job. My wife and I were devastated by the news. So for now I am still unemployed. My wife is a RN and is working extra days each month which has put us in the black by a little bit. Of course I feel like crap letting her support me but it is what it is. I find myself in a panic most days, trying to figure out how I am going to get back to my six-figure salary when all of the jobs around me are for about $9.50 an hour. I hadn't realized how much I took my income for granted.
I used to scoff at the pro-ball players who would make millions and then find themselves bankrupt a couple of years later. Now I feel I have done the same stupid thing.
However, today I feel calm. I feel this way because God has blessed me so much. Not only are we slightly in the black due to my wife's hard work but out of the blue we received a large (totally unexpected) escrow check from where we had been over paying the house note. It is a miracle and soothes me. This is the 3rd time in the past 5 years things have gotten tight but in both of the first cases, God sent me a windfall right at the last minute. With this escrow check, I feel as if God is letting me know, the windfall is coming, just be patient.
I don't know what the future holds but I know God is with me and it will be okay.
Monday, July 6, 2015
A Nope Snake
 |
| Nope! Nope! Nope! |
A few weeks ago I went to the farm where we first started our apiary and collected all of my old hives.
The mason blocks I originally used had, for the most part, turned to rubble. This left many of the hives laying in the mud, accelerating their deterioration.
However some of the hives seemed to be frozen in time like the remnants of an ancient civilization. And like the Mayan ruins of Chichen Itza, what caused the exodus of my bees can only be speculated about.
With each hive I gathered, my spirit fell a little lower as I began to fully realize how many of my original 100 supers had been lost to rot. Even now, I feel a little sad at the thought.
As I gathered box after box, my thoughts jumped from the cost of repairs to the hours it would take to rebuild the supers. Yet, my thoughts were instantly brought into the moment when I lifted the lid of one of my hives only to find a big ass Nope Snake -- to be honest, I may have peed a little.
I immediately jumped back, keeping the lid between myself and what was obviously an Anaconda! Now I don't have a phobia of snakes. I just really hate them. It's not that I am scared of them, it is simply the fact that I have the reflex time of a sloth in oatmeal. If a snake were to feel inclined to bite me, my only quick muscle reaction would be in the form of my bowel movement.
My wife was driving the truck along the route as I loaded the trailer with the old supers but I decided not to alarm her until all of the work was done -- no need to worry her. I took a few pictures from a distance and then gathered the rest of the hives.
When I had gathered all of the other equipment, I went back to deal with the snake. That was when I figured out that the only thing worse than finding a snake in your hive is not being able to find it a few minutes later! I didn't spend much time looking for him. No... that is not correct... I didn't spend much time looking for him around that hive. I did however, fervently search for the Nope Snake all the way back to my truck! The hive is still out there -- I mean what's one super worth anyway?
Nonetheless, the Nope Snake is not the only horror in the attached photo. If you will look between the tan box and the white box, you will notice a sprig of poison ivy. The two weeks that followed this picture I was covered up to my elbows and knees with raspberry colored whelps that itched like fiberglass and alcohol soup.
I love beekeeping but I'm not sure how much more nature I can handle!
p.s. I looked it up and the Nope Snake is technically called a Speckled Kingsnake. While I don't have an unhealthy fear of snakes, I must say that just looking at the Google photos of Mississippi snakes gave me a shimmy!
Tuesday, June 9, 2015
Repairing Rotted Supers
On first inspection of my ruined apiary, I counted about 100 supers. However, I soon found out that the decade of neglect, water damage, and mice had destroyed nearly all them to one degree or another. My friend Marvin reassured me that things were not nearly as grim as they seemed and encouraged me to try and replace only the bad spots in each box.
His advice proved golden as I have so far salvaged 63 of the supers for about $1 each in materials. Here is how I did it.
Lets start with what they looked like:
 |
| Beyond repair |
 |
| Medium Damage |
 |
| Light Damage |
 |
| Roaches |

A quick note on the roaches... DEAR GOD THERE WERE A LOT OF ROACHES!!! I'm not squeamish by any means. I didn't mind the plethora of spiders or legion of sugar ants or even the gaggle of slimy slugs... but there is something so unsettling about roaches. They crawled in my shirt and up my neck. Eventually I could feel them even when they weren't there anymore. It felt like that scene from Creep Show where the roaches start coming out of the guy's mouth. Please hold while I shimmy......
Anyway, as you can see, the boxes were in rough shape. Rather than just cutting out a 4"x4" square here or 8"x2" strip there, I instead cut 3 1/2" from one end to the other where ever the box needed repair. This gave me a good solid foundation to nail to and didn't weaken the sides of my supers. Like this:
 |
| The A005 is my 1st attempt at labeling hives for my records. I think marking the lids will prove to be a better system. |
In some cases this had to be done on all 4 sides since many of the boxes had been sitting directly on the ground for years. In the cases where more than half the box was rotted or where an entire side was rotted, I placed the box in a different pile to be re-evaluted in a few days.
After cutting out the rotted spots, I used Elmer's Wood glue and 1 1/4" finishing nails to reassemble the boxes. I didn't use any fancy joints (finger joints or dovetail or the like). I simply cut out the bad spots, added new boards, and then glued and toenailed them into place. Some boxes only needed a single board while others received as many as six. I paid $2.70 for 1x4x8' yellow pine and was able to get 5 to 7 boards from each (depending on whether it was the long side or the short side.)

As you can see, I rushed the new boxes into the field without painting them first. This was not by choice and will need to be rectified as soon as possible. What happened was I ordered 8 new queens from Bordelon Apiaries in Gary, La. Super nice people that managed to fit me in but then sent the bees to me 3 days early. Since I was offshore when I ordered them and didn't get home until a day after the bees arrived, I was forced to rush them into the field. (I'll post those details in a later blog.)

My point is that one of my newly repaired boxes was left in an upside down lid on my trailer (the little red one you see above) and already is showing signs of water damage. So never forget to paint the boxes.
The moral of the story is that a rotted super is not the end of the world. The new repairs seem just as strong as the original boxes.
I finished my repairs last Friday but by that night began to feel a burning in my sinuses. My son had been mildly sick all week so I may have caught something from him. However, there was mold in some of the boxes (I will bleach out later) and the table saw did disperse a lot of dust into the air. Whatever the cause, I have been very sick ever since then and unable to get off the couch (which is given me time to blog). In the future I will wear a dust mask when cutting old wood.
Disclaimer: This blog is a journal and is only meant to share my experiences. If you choose to use any of this information then you do so at your own risk. That being said, do try to be safe. On more than one occasion, my table saw cut through old nails that could have caused real injury. Always wear the proper PPE and pre-plan your work.
Subscribe to:
Posts (Atom)